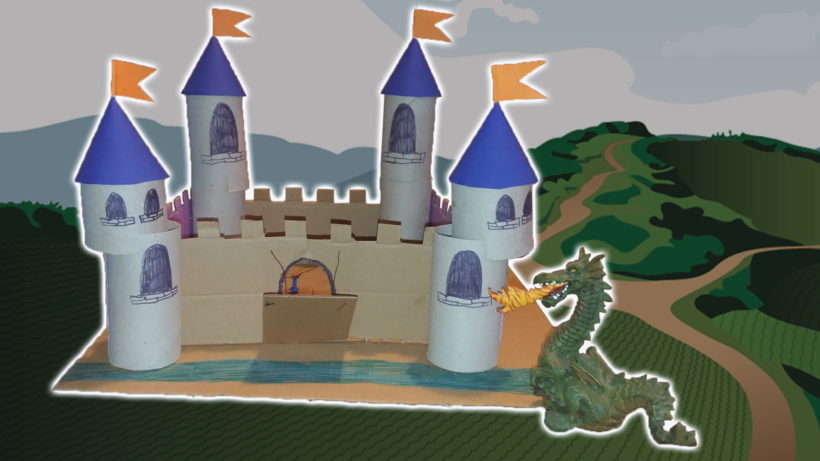
You would probably be surprised if you count how many rolls of toilet paper you throw out every month. Have you ever thought: “Is there a better way to use those same rolls?” Like by doing something creative? If you are looking for some ideas on what project to make, you are in the right place. Today, we are making Cardboard Castle!
Article Contents
1. Short History of Castles2. The three most common types of Castles
2.1. Motte and Bailey Castles
2.2. Stone Keep Castles
2.3. Concentric Castles
3. Materials needed for Cardboard Castle
4. Instructions for making the Toilet Roll Castle
5. What will you learn by making the Castle
Short History of Castles
Fun fact: Castles didn’t have toilets! At least not in the way we use them today. They had little rooms called “garderobe”, practically just a hole through which they send their waste products to the moats. Why garderobe? They also kept their clothes there! Thankfully, today we have proper toilets and toilet paper from which we can create our own castle!
Almost everyone is fascinated by castles. They are grand and majestic, a symbol of power and strength. One of the oldest standing castles in the world is the Citadel of Aleppo, located in northern Syria. Its construction took place 3000 years B.C.
When we think about castles, we usually think of fortified structures built in the Middle Ages in Europe. They were used as a residence for nobility, and served as defensive structures but also centers of administrations.
Castles started to appear in the 9th and 10th centuries. In the beginning, they were made mostly out of earth and wood, but soon stone became primary building material. Later, in the 12th and 13th centuries, more complex designs started to emerge and defensive capabilities were improved with towers and moats.
There are 4 types of similar structures that people usually mix:
- Castle – fortified residential structure for nobility
- Palace – residence for nobility that is usually not fortified
- Fortress – military structure, not a residence
- Fortified settlement – settlement surrounded by the walls for the defense
The three most common types of Castles
In different periods of history and different regions of the world, people were building very different types of castles. But the most popular and well known are Motte and Bailey Castle, Stone Keep, and Concentric Castles.
Motte and Bailey Castles
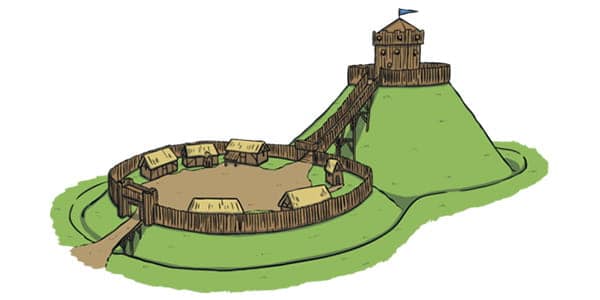
These types of castles were first built in northern Europe in the 10th century. Thus, they were the earliest type of medieval castle. They were built from Motte and Bailey, as the name suggests.
The Motte was usually a wooden keep or a lookout tower built on the hill. The outer edge of the Motte was surrounded by a wooden fence called a palisade. The difference between palisade and the wall is that palisade couldn’t be manned while the wall usually meant that people can stand on it.
The Bailey was a surrounding area around Motte where people lived. Large Motte and Bailey Castles could have more Baileys.
Usually, Motte also had a wooden bridge that could be removed if the Bailey was occupied. The bridge would go over a ditch that was surrounding the Motte and in many cases the Bailey. Some Motte and Bailey Castles filled the ditches with water and that provided an extra layer of protection from attackers.
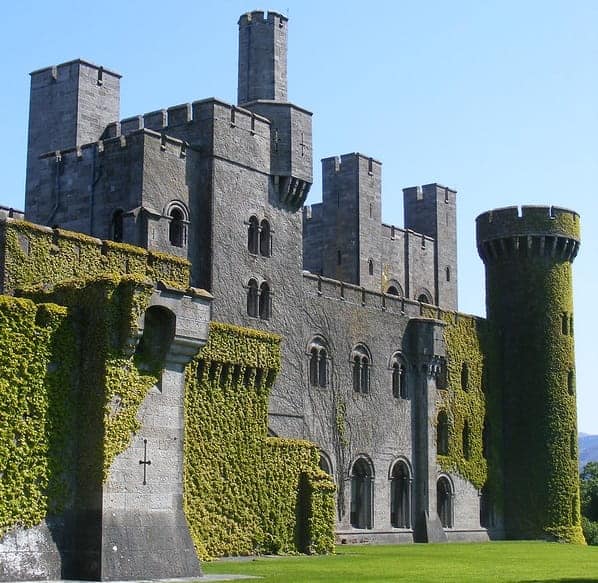
Stone Keep Castles
Stone Castles started to appear around the 11th century and they soon replaced Motte and Bailey Castles since they provided superior protection.
In the center of the Castle was the Keep that was made from thick stone walls and only a few windows. On the ground floor, we could usually find kitchens while the living quarters were on the upper floors. First stone Keeps were in a rectangular shape and in later centuries they were often replaced with a circular shape.
Stone Keeps were surrounded by thick stone walls (that could be manned) and towers or turrets that served as a lookout tower but could also hold archers and in some cases siege weapons.
Stone keeps often had the second layer of walls – outer walls. Now the area between inner walls and outer walls was a Bailey. It was a place for craftsman shops and commerce. The outer wall was usually surrounded by a ditch or moat with a drawbridge protecting the entrance.
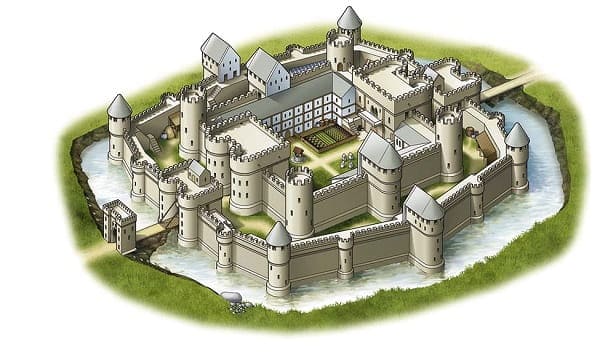
Concentric Castles
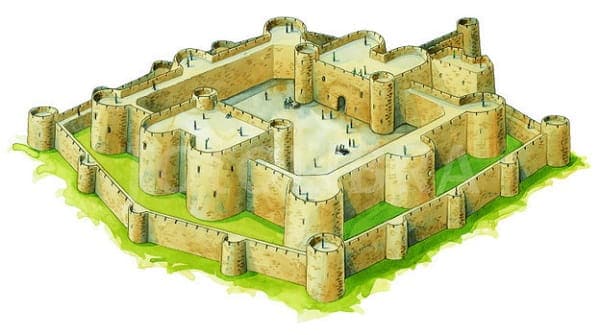
The pinnacle of the Castle building, Concentric Castles were introduced in the late 12th and early 13th century. They offered the best possible protection against the attackers until the introduction of gunpowder weapons.
The main feature of the Concentric Castles design was its construction on different levels. The Center was the highest part that was surrounded by thick stone inner walls. Those walls also contained turrets or lookout towers that were built on specific distances from each other all across the wall.
The next layer of walls, outer walls were lower than inner walls so archers on the inner walls could safely shoot across the outer wall.
The space between the inner and outer wall was called the “death hole” since being caught between the walls would surely mean death for the attackers.
The outer walls, and with that entire castle, was also surrounded by a moat, and the only entrance was a drawbridge. These magnificent structures presented a formidable obstacle for attackers and could withhold a siege for a long time.
Materials needed for Cardboard Castle
- Paper rolls (we used 8 rolls)
- Cardboard
- Scissors
- Glue
- Markers
- Colored Paper (or ordinary paper)
- OPTIONAL:
- Staple
- Toothpicks
- Needle and Thread
- Pin
Instructions for making the Toilet Roll Castle
We advise you to check out our video guide located at the beginning of the article, for more detailed instructions! If you can’t watch the video or just prefer reading, here is a detailed description of how to make a cardboard castle.
1. From a bigger piece of cardboard, cut out the rectangular shape – that will be the base of your castle. The shape is not that important, it can be circular or any other that you desire. It can also be from any other material, not necessarily cardboard. Most important is that our base is stable and thick enough so we can glue the rest of our castle to it. It will definitely ease the transportation of our castle later.
2. Make your towers using the toilet paper rolls (or any other sturdy paper rolls).
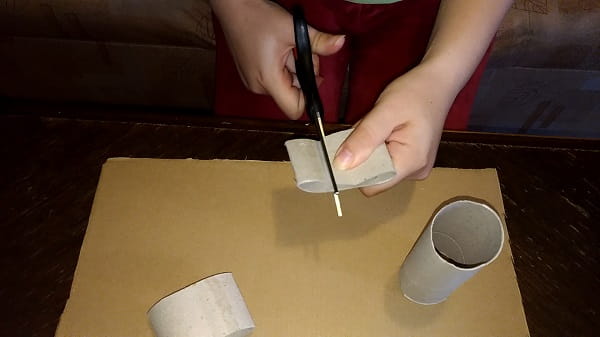
a) Small tower: You will need 3 paper rolls to make two towers. Cut one toilet paper roll horizontally in half. The shape should stay the same, and we will get two equal, just smaller, toilet roll tubes. Make a cut on both smaller toilet rolls on two places and attach them on the other two normal size paper rolls. Decorate as you wish. So we will make 2 small towers in total using this method.
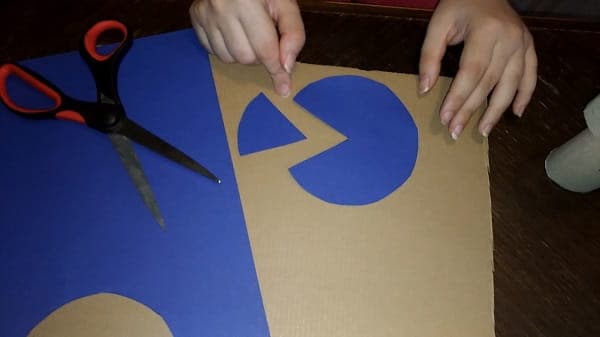
b) Make roofs for your towers. Use the divider to measure a circle. Measure so the circle diameter is around 2 centimeters bigger than our toilet roll tube diameter. Draw the circle on colored paper and mark the center. Cut out the circle. Now cut a triangle piece on one side of a circle (with one point in the center). When you cut it out, the remaining paper is shaped like a Pac-Man. Take one side of that shape or overlap it with another – you should get a shape of a cone. You can glue our paper roof with hot glue or use a staple to make a cone. That will be the roof of our tower. Repeat the procedure 3 more times to make 4 roofs for four towers.
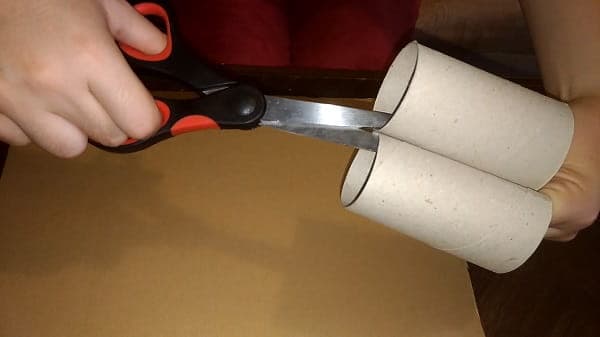
c) Big tower: Similar to small towers, the only difference is we will use 2 whole toilet paper rolls instead of one and a half. You will need 2 paper rolls. Connect those 2 rolls side by side and make a cut with scissors through both of them, so it’s identical on both rolls. Put one roll on top of the other and rotate them until they are attached together in the cuts you just made. Now we have made a big tower for our cardboard castle. Decorate as you wish. Make another tower like that since we need 2 big towers.
3. Now to make the walls. From ordinary cardboard, cut the walls which will connect the towers. Take one whole toilet paper roll and measure the height. Cut the wall from the cardboard that will be the same height as the toilet roll. We will need 4 walls in total so cut four pieces of the wall from the cardboard. Decorate them as you wish. You can cut the battlements on the cardboard to make your walls look more realistic. Also, don’t forget to cut out the entrance on the front wall.
4. Glue the walls on the towers so everything is connected. We used hot glue, but any type of quality glue for cardboard will be good. Attaching our 4 castle walls for our four towers will create our castle. Just a few more finishing touches and we are done!
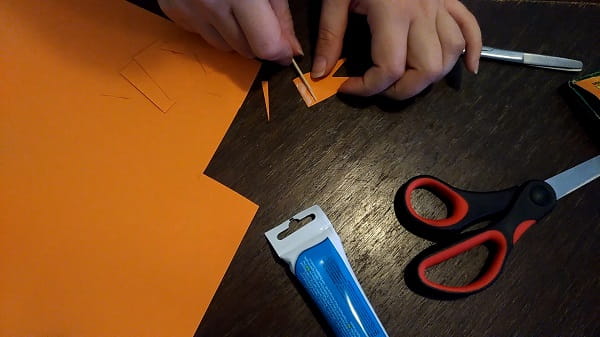
5. Now to decorate. You can make flags that will make your castle unique. Cut a little rectangular piece of paper and glue it on the toothpick. You can use the colored paper, or just regular paper and draw your unique crest on the flag. Then just stick the toothpick on the top of the roof.
6. Improve the castle in any way you like, make it your own. We made a drawbridge, but we won’t reveal our method. We challenge you to make your own design and to share it with us!
What will you learn by making the Castle
- STEM Engineering
- Creativity, design
- Oculomotor coordination
- Spatial skills
- Physics
We hope you enjoyed making this cardboard castle, but the fun has just started! After you make it, it can be used for many more hours with amazing castle games you can play. Bring out your knights, dragons and mighty sorceresses and experience grand adventures.
If you search for even more arts and crafts ideas with simple ingredients, check out How to make Cardboard Clock. And we recommend you try and build your own, working, cardboard projector. Also, if you are interested in building, check out our STEM Engineering activity Let’s build with playdough or you can stay medieval and lay siege on your castle with a popsicle catapult. And if defenders need help, they can send a message with a cipher wheel so the enemy doesn’t know that help is coming!
If you’re searching for some great STEM Activities for Kids and Child development tips, you’re in the right place! Check the Categories below to find the right activity for you.

STEM Science
Videos, guides and explanations about STEM Science in a step-by-step way with materials you probably already have at your home. Find new Science ideas.
Read more
STEM Technology
Videos, guides and explanations about STEM Technology in a step-by-step way with materials you probably already have at your home. Find new Technology ideas.
Read more
STEM Engineering
Videos, guides and explanations about STEM Engineering in a step-by-step way with materials you probably already have at your home. New Engineering ideas!
Read more
STEM Math
Videos, guides and explanations about STEM Math in a step-by-step way with materials you probably already have at your home. Find new Mathematics ideas.
Read more
Psychology
Find out all about development psychology topics that you always wanted to know. Here are articles from child psychology and development psychology overall.
Read more
First year of Child’s Life
Following a Child’s development every month from its birth. Personal experiences and tips on how to cope with challenges that you will face in parenting.
Read more
6 thoughts on “How to make a Castle from Toilet Paper Rolls”