Everyone loves Balloons! And today we will show you how to make them even more fun. How? With the science of course. We will show you 5 amazing Balloon experiments for demonstrating various scientific principles. Fun is guaranteed!
Article Contents
1. The brief history of the balloons2. Physics principles of the balloons
3. 1. How to use Science to Blow Up a Balloon
3.1. Materials needed for the Experiment
3.2. Experiment Instructions
3.3. The science behind the experiment
4. 2. Burning a Balloon without popping it
4.1. Materials needed for Burning the Balloon
4.2. Instructions for Burning the Balloon Experiment
4.3. The science behind the Burning the Balloon experiment
5. 3. Pinning a Balloon
5.1. Materials needed for the experiment
5.2. Instructions for the experiment
5.3. The science behind the experiment
6. 4. Balloon on the Stick
6.1. Materials needed for the balloon on the stick
6.2. Instructions for the balloon on the stick experiment
6.3. The science behind the balloon on the stick experiment
7. 5. Demonstrating Centripetal force
7.1. Materials needed for demonstration
7.2. Instructions for demonstrating centripetal force
7.3. The science behind the centripetal force experiment
The brief history of the balloons
First balloons, as archeological findings show, were made from animal intestines, especially from pig bladders. Archeological findings also show that first balloon sculptures were used by Aztecs. They were made from cat intestines and were presented as a sacrifice to the gods.
The first rubber balloon was made in the year 1824 by Professor Michael Faraday. He was using them for experiments he was conducting with the hydrogen. He described the balloons as caoutchouc bags that are highly elastic and that they can expand by forcing the air into them until caoutchouc becomes transparent. He also explains how they, when expanded by hydrogen, become so light that they possess considerable ascending power. Faraday made his first balloons by making two sheets of rubber and connecting the edges of those two sheets to each other. Since the rubber was tacky, he had to put flour in the middle so the rubber does not connect. On edges, the rubber would connect automatically due to its stickiness.
Latex rubber balloons were invented and pioneered in the year 1825 by rubber manufacturer Thomas Hancock. Vulcanized balloons were introduced in the year 1847 by J.G. Ingram and they were the first balloons that were not affected by changes in temperature. Vulcanized balloons are regarded as the prototype of the modern-day balloons.
Modern-day balloons are made from different materials but mostly rubber, latex, polychloroprene, and nylon fabric. Also, we can find today’s balloons in many different shapes, sizes, and colors.

Physics principles of the balloons
We all know that balloons fly. Ok, fall slowly. But did you know there is science behind why is that so? Let’s dive into some physics and explore the principles of why balloons “fly”.
When we inflate the balloon with regular, atmospheric air, the air pressure will become greater than the atmospheric pressure outside of the balloon.
Air pressure actually represents how many particles collide with the surface at any given time. Since there is less space in the balloon, they collide and bounce off the inside surface a lot more than particles from outside do. This happens because of the density. The more particles are in the same space (like in the balloon), the more frequent will they collide with the wall or surface.
To understand why balloons “fly”, it is important to understand how air pressures function. Air pressures outside of the balloon and inside try to even out. The force from the inside of the balloon makes the balloon to expand while the forces from the outside of the balloon make it contract. With this knowledge, we could assume that the balloon with high air pressure would expand until the air pressures are equal inside and outside.
But there is a twist! Balloons posses certain elasticity that plays an important role. Now the air inside needs to have a lot more pressure since it must counteract the elastic membrane of the balloon that tries to return in the original state and the air pressure from the inside. That makes the balloon light and with some gasses like helium even lighter than atmospheric air.
An excellent example of this is the helium balloons. They will raise in the air and as they get higher, the atmospheric pressure gets smaller and smaller. The inside of the balloon exerts more pressure because of that and the balloon will pop from tension. If they don’t pop, helium will leak from pores of the balloon eventually making the balloon to fall down.
Check the video for making all of the activities at the start of the article or continue reading instructions below for each activity if you prefer text description.
1. How to use Science to Blow Up a Balloon
Materials needed for the Experiment
- Balloon
- Vinegar (2 dl)
- Baking Soda (2 spoons)
- Empty Bottle
- Yarn
- Funnel
Experiment Instructions
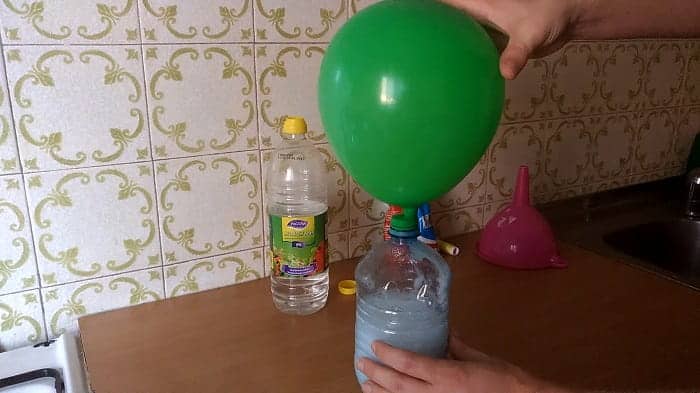
- Pour 2 dl of vinegar into the empty bottle.
- Put Balloon on the funnel and pour 2 spoons of baking soda into it. If you put more, the reaction will be stronger but there is danger of liquid shooting out of the bottle
- Now put Balloon on the bottle, lift it up, so soda drops into the vinegar. After a few seconds Balloon will be blown.
- Use yarn to tie down Balloon and you are done!
The science behind the experiment
When we mix vinegar and baking soda we produce an acid-base reaction. The baking soda (base) takes one hydrogen proton from the vinegar (acid). That turns vinegar into a different substance called sodium acetate and baking soda into the carbonic acid. Carbonic acid is unstable and quickly separates into carbon dioxide gas and water. The gas rises up and since it needs more space it expands into the balloon.
2. Burning a Balloon without popping it
Materials needed for Burning the Balloon
- Balloon
- Yarn
- Candle
- Matches
- Water
Instructions for Burning the Balloon Experiment
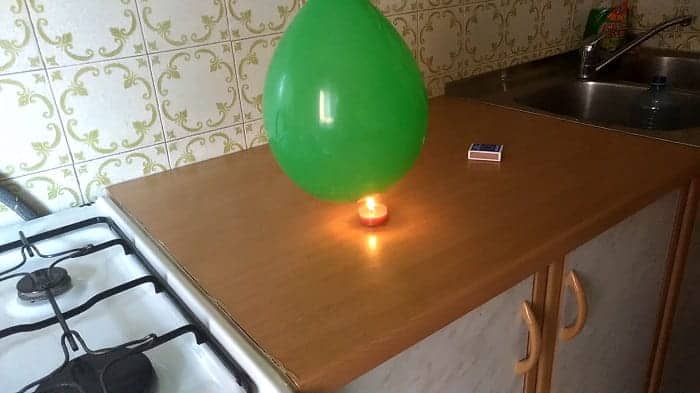
- Put the balloon onto the faucet and let it fill with water ( around 2 dL). Blow up the balloon and tie it down. You can also first blow up the balloon then put it on the bottle with water and just fill it.
- Light the candle and bring Balloon over it. The balloon won’t pop! If you try it with an empty balloon it will pop instantly.
The science behind the Burning the Balloon experiment
One of the amazing properties of the water is the ability to soak up the heat. The flame causes water to heat up. That heated water goes up and pushes cooler layer down so it’s heated again. That process happens rapidly and it prevents heat from popping up the balloon. That lasts as long as we don’t heat up all the water, so after some time Balloon will pop. One good real-life example of this is sweating! When our body is heated, we start to sweat. That is a defensive reaction of our organism, putting a layer of water on us and preventing overheating.
3. Pinning a Balloon
Materials needed for the experiment
- Balloon
- Yarn
- Pins
Instructions for the experiment
- Blow up the balloon and tie it down.
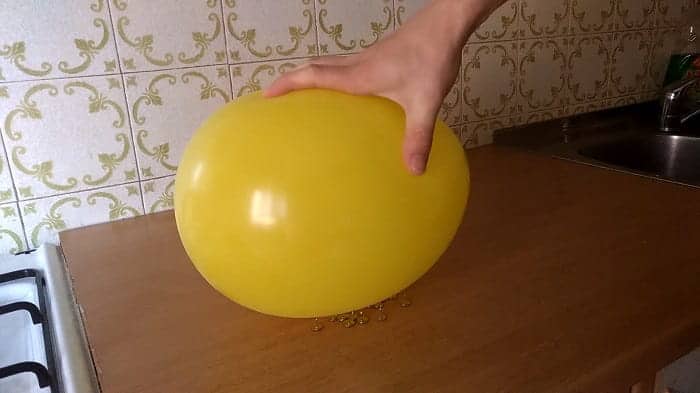
- If you try putting it on one pin it will pop. Put many pins on the surface (sharp part up) and then try to put Balloon on top of it. It won’t pop!
The science behind the experiment
This is a great experiment to demonstrate one of the findings of Classical Mechanics – distributed pressure. When we put the balloon on one pin, the pressure is concentrated on one spot and it’s easy to break a thin layer of the balloon. However, if we distribute that pressure over the many points on the balloon, the force of any of them is too small to burst the balloon.
4. Balloon on the Stick
Materials needed for the balloon on the stick
- Balloon
- Yarn
- Wooden Skewer
- Dishwashing liquid
Instructions for the balloon on the stick experiment
- Blow up the Balloon (not fully) and tie it down.
- Look at the Balloon and identify areas where it’s darker (rubber is thicker). One spot is right where you tie down the Balloon and the other is on the opposite side.
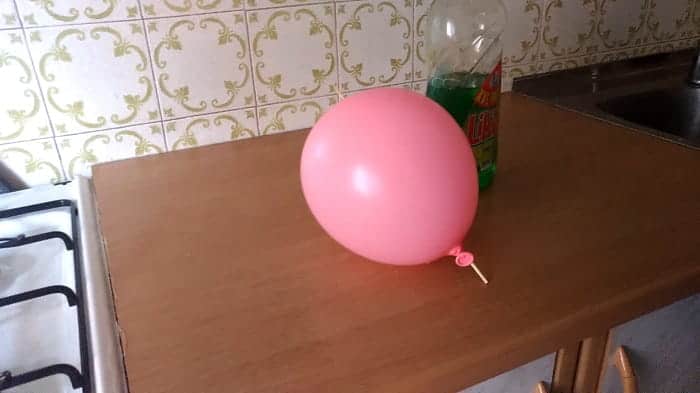
- Coat the wooden skewer with dishwashing liquid ( you can also use vaseline) so it feels smooth.
- Pierce the Balloon on one of the spots we previously identified and push it in. Let it come out on the other spot, on the opposite end. You now have Balloon on the stick!
The science behind the balloon on the stick experiment
A balloon is made of rubber, and that rubber consists of a long chain of polymers. Blowing up the balloon stretches these polymer chains. However, there are areas on the balloon where they are stretched more (under greater surface tension) and where they are stretched less (under less surface tension). We identified these points of less tension, so we can pierce the Balloon on those points. Making small holes on those spots don’t produce enough surface tension for the balloon to burst.
5. Demonstrating Centripetal force
Materials needed for demonstration
- Balloon
- Yarn
- Coin
Instructions for demonstrating centripetal force
- Insert the coin inside the Balloon. Try to push it as far as you can, but it doesn’t have to go all the way in.
- Blow up the balloon and tie it down.
- Shake the Balloon in a circular motion. You will see the coin spinning.
- Stop the motion and the coin will continue its movement for some time.
Warning: this activity is addictive! 😄
The science behind the centripetal force experiment
To move anything, including our coin, we need to input some energy. In this case, our original circular shaking of the balloon supplied needed kinetic energy. The round shape of the balloon forces our coin to move in a circular way, otherwise, it would continue moving forward. There is not that much friction between the coin and the surface of the balloon, so the coin moves for a long time after we stop the motion. But, in time, friction and gravity force out the coin to halt.
Important force here is Centripetal force. This is a center-seeking force that acts on our coin and constantly changes its velocity so it remains in the circular motion. The natural state of all objects is to continue forward motion, but if we apply enough force we can change that. Examples of this ere moons and satellites orbiting planets.
Here gravity acts as a centripetal force. In our coin example, it works because of the friction between our coin and the surface of the balloon. That makes our coin move in a circular path and not just randomly jumping inside of a balloon.
We hope you enjoyed these fun balloon activities. And if you’re searching for more fun STEM experiments that kids will love, you can demonstrate osmosis using gummy bears. Or if you want to see how to raise the water using a candle, check out the candle in the vacuum experiment. And some other similar experiments we would like to recommend are demonstrating light bending and making a dancing grain experiment. And if you still have some balloons that you would like to use, be sure to check how to demonstrate air pressure with balloon activity and how to make an anti-stress ball using the balloon and flour. Happy learning!
If you’re searching for some great STEM Activities for Kids and Child development tips, you’re in the right place! Check the Categories below to find the right activity for you.

STEM Science
Videos, guides and explanations about STEM Science in a step-by-step way with materials you probably already have at your home. Find new Science ideas.
Read more
STEM Technology
Videos, guides and explanations about STEM Technology in a step-by-step way with materials you probably already have at your home. Find new Technology ideas.
Read more
STEM Engineering
Videos, guides and explanations about STEM Engineering in a step-by-step way with materials you probably already have at your home. New Engineering ideas!
Read more
STEM Math
Videos, guides and explanations about STEM Math in a step-by-step way with materials you probably already have at your home. Find new Mathematics ideas.
Read more
Psychology
Find out all about development psychology topics that you always wanted to know. Here are articles from child psychology and development psychology overall.
Read more
First year of Child’s Life
Following a Child’s development every month from its birth. Personal experiences and tips on how to cope with challenges that you will face in parenting.
Read more
5 thoughts on “5 amazing Balloon experiments”